
How to Download and Install SafeNet Authentication Client
-
SafeNet Authentication Client is software that allows your computer to communicate with a compatible USB hardware token containing a digital certificate. For code signing, it helps your signing tools access the certificate and perform signing operations while the private key remains protected by the hardware token.
If you have received a hardware token with your code signing certificate from GoGetSSL, you may need to install SafeNet Authentication Client before you can use the certificate to sign software. This guide explains how to download and install the client on Windows, macOS, and Linux, and how to sign and verify a file on Windows.
-
-
*
Download SafeNet Authentication Client
Download the version that matches your operating system and the hardware token you are using. The available versions and supported operating systems may change, so use the official download page rather than relying on an older installer link.
- Windows: Download SafeNet Authentication Client for Windows
- macOS: Open the same download page and select the macOS version compatible with your system. Download SafeNet Authentication Client for macOS
- Linux: Open the same download page and select the package for your supported Linux distribution. Download SafeNet Authentication Client for Linux
Check the operating system requirements before installing the client. If your GoGetSSL order includes a DigiCert-provided token, follow the software and setup instructions available in your order details.
For more information, see the GoGetSSL and DigiCert Code Signing Token Setup Guide.
-
*
Install SafeNet Authentication Client
After downloading the appropriate installer, follow the instructions for your operating system.
Steps for Installing SafeNet Authentication Client on Windows
- Locate the downloaded installer. If it is provided as a ZIP archive, extract its contents first.
- Open the extracted folder and locate the installer for your Windows architecture, if separate 32-bit and 64-bit packages are provided.
- Double-click the .msi installer to launch the setup wizard.
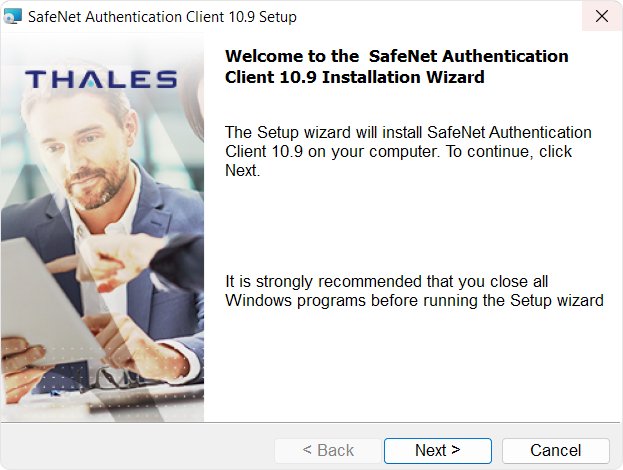
- Click Next to begin the installation.
- Review and accept the end-user license agreement, then click Next.
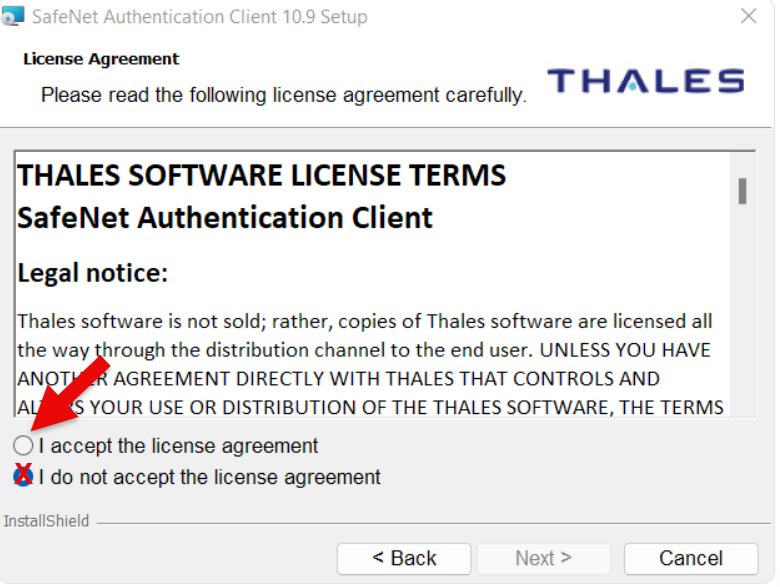
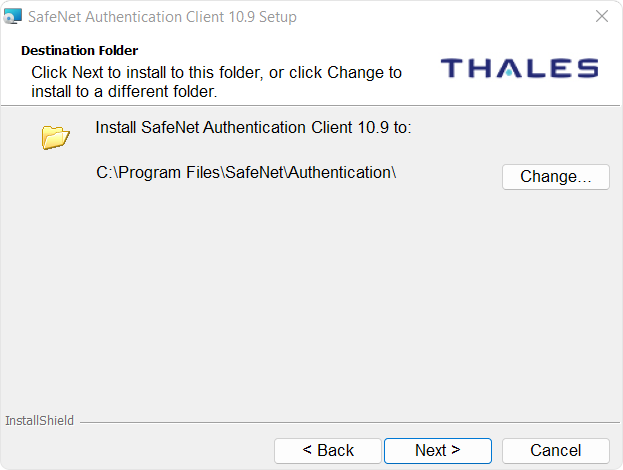
- Choose the installation location, or keep the default location.
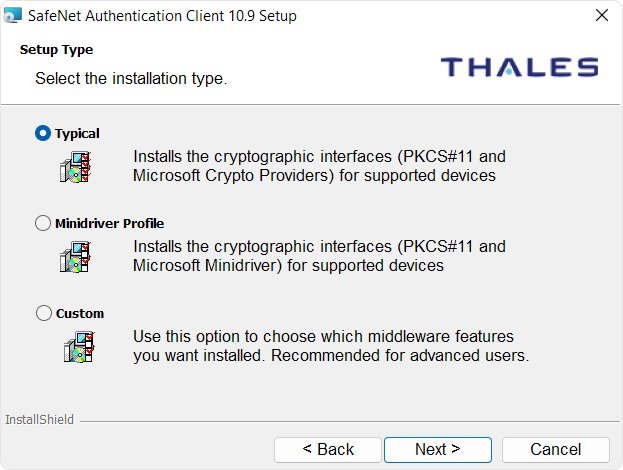
- Select the recommended installation type, if prompted.
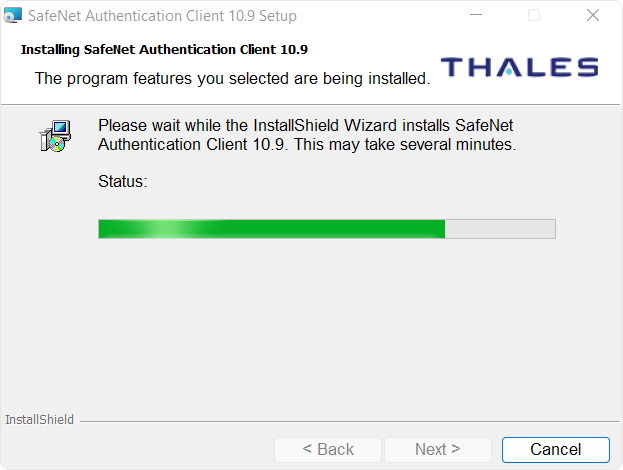
- Click Install. Approve the Windows User Account Control prompt if it appears.
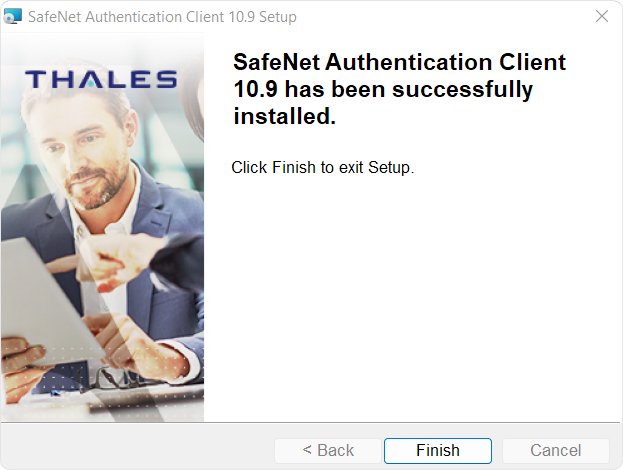
- When the installation is complete, click Finish.
- Open Windows Search and look for SafeNet Authentication Client Tools to confirm that the software is installed.
Steps for Installing SafeNet Authentication Client on macOS
- Locate the downloaded .dmg file.
- Double-click the file to mount the disk image.
- Open the mounted volume and launch the SafeNet Authentication Client installer package, usually named SafeNet Authentication Client.pkg.
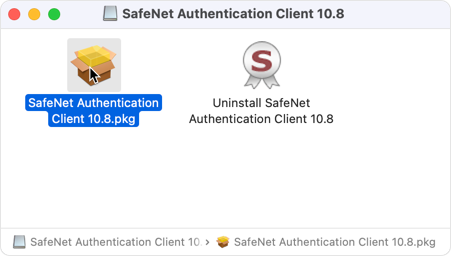
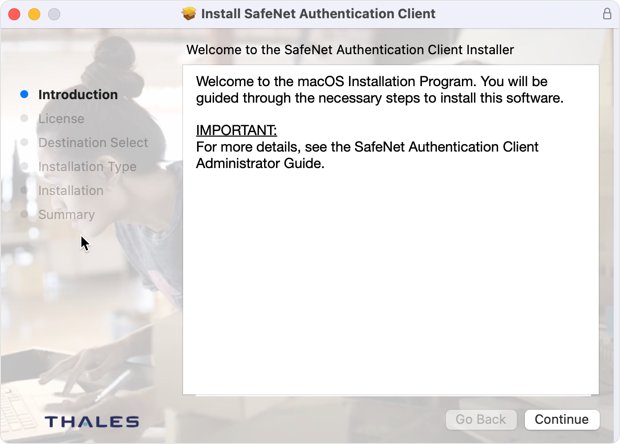
- Click Continue and follow the installation wizard.
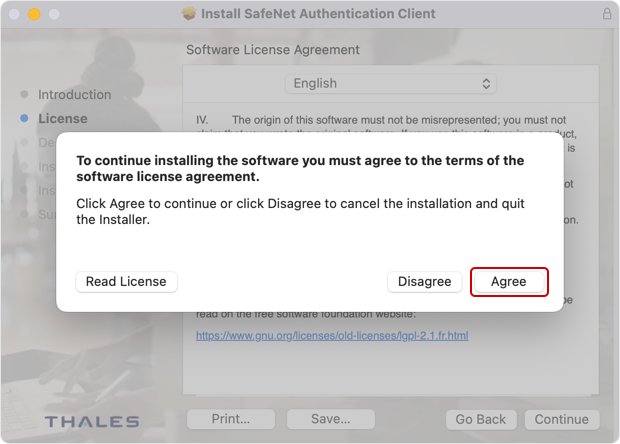
- Review and accept the license agreement, then choose the installation destination if prompted.
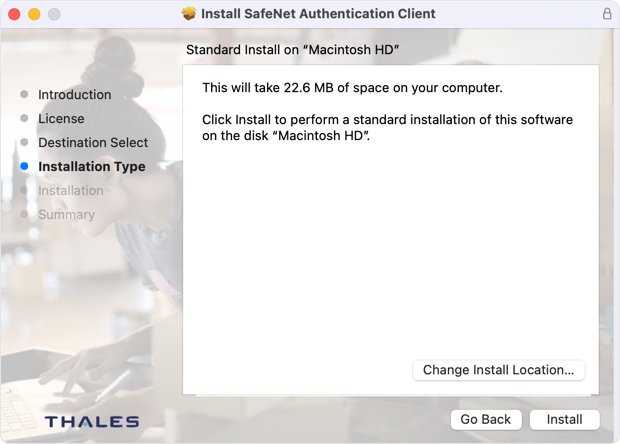
- Click Install to begin the installation.
- Enter your administrator password if requested.
- After installation, check your Applications folder for SafeNet Authentication Client.
The exact screens and package names may differ between versions. Make sure the installer supports your macOS release and token model.
Steps for Installing SafeNet Authentication Client on Linux
The installation process depends on your Linux distribution. The official download page provides packages for supported distributions, including Debian- and RPM-based systems.
- Locate the downloaded ZIP archive and extract its contents if necessary.
- Open the folder containing the package for your distribution.
- For Ubuntu or another supported Debian-based distribution, locate the .deb package. For a supported RPM-based distribution, locate the .rpm package.
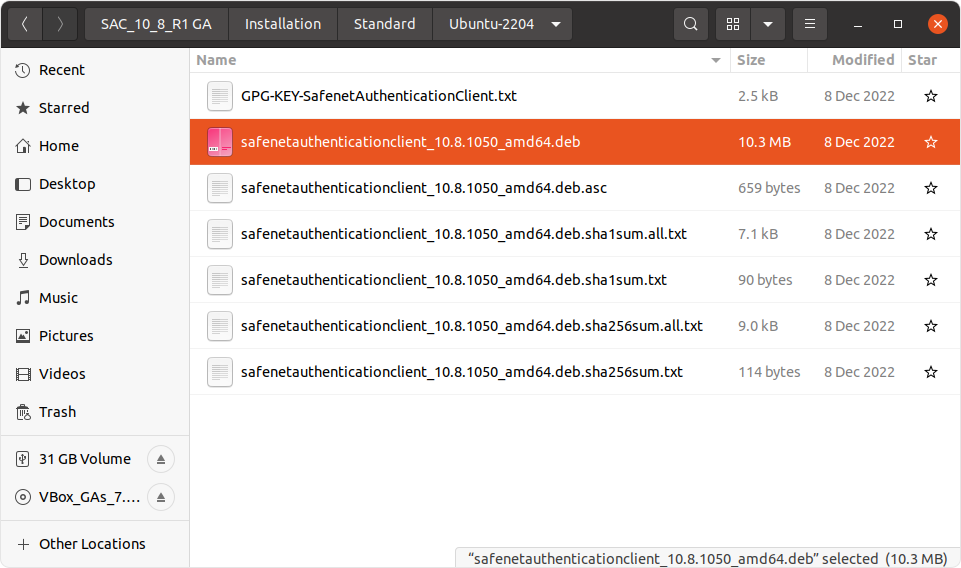
- Install the package using your distribution's package manager.
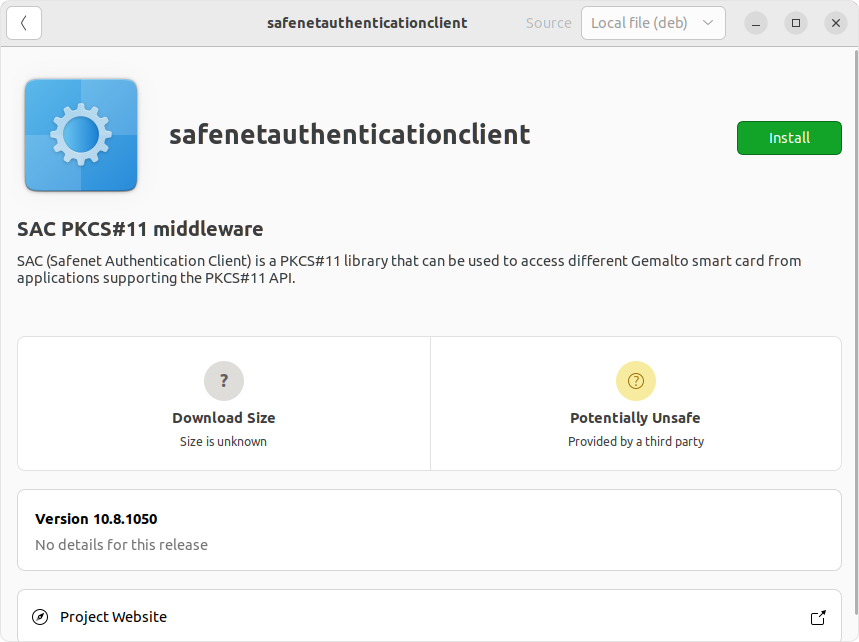
- Authenticate with your administrator credentials if prompted.
- Follow any post-installation instructions supplied with the package.
Package names and installation commands vary by version and distribution. Use the instructions provided with the downloaded package rather than assuming that one command works on every Linux system.
-
*
How to Use a Code Signing Certificate with SafeNet Authentication Client
Once the client is installed, you can check whether your hardware token is detected and use the certificate to sign software. The following signing instructions apply to Windows and Microsoft SignTool.
Ensure the Certificate Is Available on the Hardware Token
- Insert the USB hardware token containing your code signing certificate into your computer.
- Open SafeNet Authentication Client.
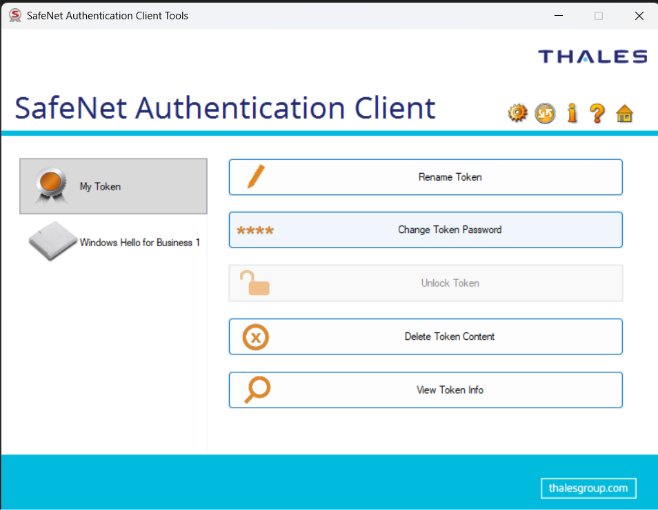
- Check whether the token and certificate appear in the application.
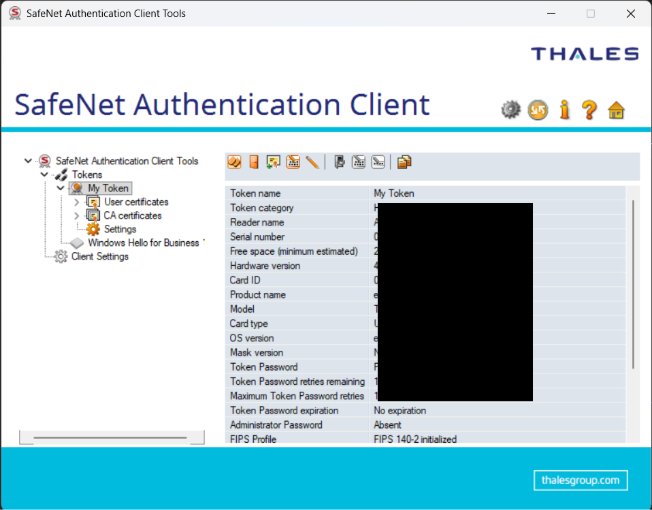
- If the token is not detected, reconnect it and check whether the required drivers and client software are installed correctly.
If you have received a new token from GoGetSSL, follow the token setup instructions associated with your order before proceeding.
Prepare the Hardware Token
Some tokens need to be initialized or configured before they can be used. Follow the instructions provided for your specific token and certificate.
For more information, see the GoGetSSL and DigiCert Code Signing Token Setup Guide.
If your token is already configured or contains an issued certificate, do not initialize or reinitialize it unless the official setup instructions specifically require this. Reinitialization can erase existing keys and certificates.
Sign a File Using the Code Signing Certificate
On Windows, Microsoft SignTool can sign executable files and other supported file types. SignTool is included in the Windows SDK.
- Install a compatible version of the Windows SDK.
- Locate signtool.exe in the Windows Kits installation directory. The exact path depends on the installed SDK version and whether you need the x86 or x64 executable.
- Open Command Prompt or PowerShell.
- Run the signing command below, replacing the timestamp server and file path with the appropriate values:
signtool sign /tr http://timestamp.sectigo.com /td SHA256 /fd SHA256 /v "C:\path\to\yourfile.exe"
Note: Use the timestamp server recommended by your certificate authority. For example, Sectigo provides http://timestamp.sectigo.com, while DigiCert provides http://timestamp.digicert.com.
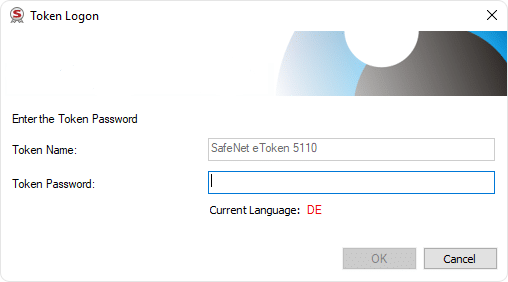
- When prompted, enter the token password or PIN required to access the signing certificate.
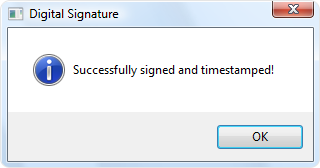
- Wait for SignTool to complete the operation and check the command output for a success message.
The timestamp server must be reachable from your computer. If your certificate was issued by a different CA, confirm its recommended timestamp URL before signing.
Test and Verify the Digital Signature
After signing the file, verify that the signature is valid.
You can use SignTool from Command Prompt or PowerShell:
signtool verify /pa /v "C:\path\to\yourfile.exe"
Alternatively, on Windows:
- Locate the signed executable.
- Right-click the file and select Properties.
- Open the Digital Signatures tab.
- Select the signature and view its details.
- Check the signature status and certificate information.
A successful verification indicates that Windows recognizes the signature as valid under the selected verification policy. It does not, by itself, guarantee that the software is safe to run.
-
*
Troubleshooting
Issue 1: SafeNet Authentication Client Does Not Detect the Token
Possible solution:
- Disconnect and reconnect the hardware token.
- Try a different USB port.
- Confirm that the installed SafeNet Authentication Client version supports your token and operating system.
- Check whether the required device drivers are installed.
- Restart the computer if the token remains undetected.
Issue 2: The Token Password or PIN Is Rejected
Possible solution:
- Confirm that you are entering the correct token password or PIN.
- Check whether the token uses separate user and administrator credentials.
- Follow the manufacturer's recovery instructions if the credentials are lost or the token becomes locked.
Do not repeatedly guess the PIN or password, because some tokens lock access after a limited number of unsuccessful attempts.
Issue 3: SignTool Cannot Find or Access the Certificate
Possible solution:
- Check that the token is connected and recognized by SafeNet Authentication Client.
- Confirm that the code signing certificate is installed on the token and has not expired.
- Make sure you installed the correct Windows SDK and are using the appropriate SignTool executable.
- If multiple certificates are available, select the intended certificate explicitly instead of relying on automatic selection.
Issue 4: Timestamping Fails During Code Signing
Possible solution:
- Confirm that the timestamp URL is correct for your CA.
- Check your internet connection and any firewall or proxy restrictions.
- Make sure the timestamp server supports the timestamping options used in your command.
- Retry the operation after resolving any network or server issue.
-
*
Conclusion
SafeNet Authentication Client allows compatible hardware tokens and their certificates to be accessed by supported signing software. Once the client is installed and the token is configured, you can use Microsoft SignTool on Windows to sign files and verify their digital signatures.
For GoGetSSL or DigiCert-provided code signing tokens, follow the setup instructions associated with your order and use a SafeNet Authentication Client version compatible with your operating system and hardware.
To explore available options, visit the GoGetSSL Code Signing Certificates catalog.
-