

How to Use YubiKey for a Code Signing Certificate
-
Your Code Signing certificate acts as a digital seal of authenticity for your software. It helps users verify the publisher's identity and check whether signed files have been modified after signing.
Code Signing certificates are issued by trusted Certificate Authorities (CAs). To protect the certificate's private key, you can use a compatible YubiKey hardware token. The device keeps the private key protected and requires authorized access to perform signing operations.
-
-
*
What Is YubiKey?
A YubiKey is a hardware security key developed by Yubico. It provides additional security for online accounts, applications, and supported cryptographic operations.
YubiKey supports several authentication and cryptographic protocols, including FIDO, PIV, OATH-HOTP, and OpenPGP, depending on the model. For Code Signing, the relevant functionality is PIV (Personal Identity Verification), which allows a compatible device to store a private key and certificate and perform cryptographic operations.
A YubiKey is not a general-purpose Hardware Security Module (HSM). Whether a particular model meets a CA's hardware-protection requirements depends on the device, its certification, and the CA's issuance process.
-
*
How Do I Use YubiKey for Authentication?
Passwords can be compromised through phishing, reuse, or data breaches. Two-factor authentication (2FA) adds another verification step, and a YubiKey can provide hardware-backed authentication for compatible services.
Follow these steps to configure a YubiKey for a supported account.
Step 1: Connect your YubiKey.
Insert the device into an available USB port. If your model and device support NFC, you may be able to use that connection method instead.
Step 2: Open Yubico's setup guide.
Visit Yubico's official website and consult the documentation for your YubiKey model and the service you want to protect.
Step 3: Select a supported application.
Check whether the service supports security keys and which authentication protocols are available.
Step 4: Follow the service's enrollment instructions.
For example, to add a security key to a Google account, open the account's security settings, select the security-key option, connect your YubiKey, and follow the prompts. Your browser may ask you to approve access to the device.
Step 5: Name your YubiKey.
If the service offers this option, assign the device a recognizable name. This is useful if you register multiple security keys.
Once registration is complete, follow the service's instructions whenever you sign in. Depending on the authentication method, you may need to touch the key, enter a PIN, or use another supported interaction.
-
*
How to Use a YubiKey for a Code Signing Certificate
A Code Signing certificate helps establish the publisher's identity and verify the integrity of signed software. If an attacker gains access to the associated private key, they may be able to sign malicious files that appear to come from a legitimate publisher.
A compatible hardware token can reduce this risk by protecting the private key and restricting its use. The exact configuration depends on the certificate type and the CA's requirements.
Follow these best practices to protect your Code Signing setup.
Secure Physical Storage
Keep your YubiKey in a secure location, such as a locked drawer or safe, when it is not in use. Do not leave it unattended or in an easily accessible place.
Enable a Strong PIN
Protect your YubiKey with a strong PIV PIN. Avoid predictable combinations and change default credentials when required by your security policy. Keep the PIN and management key confidential.
Backup and Revocation
A private key generated on a YubiKey is generally not exportable, so you cannot simply copy it to another device as a backup. If your YubiKey is lost, damaged, or compromised, you may need to generate a new key pair and request a replacement certificate.
Keep your CSR, issued certificate files, and relevant issuance records in secure storage. Contact your CA promptly if the device is lost or compromised to determine whether the certificate should be revoked.
Offline Usage
Connect your YubiKey only when it is needed for an authorized operation and remove it afterward. Limiting access to the device can reduce opportunities for unauthorized signing.
However, hardware protection does not eliminate the risk of malware on the signing workstation. Keep the operating system and signing tools updated and restrict access to the signing environment.
Regular Maintenance and Updates
Check Yubico's documentation for applicable firmware and software updates, security advisories, and compatibility requirements. Test your signing workflow after relevant changes.
For public Code Signing certificates, consult the current CA/Browser Forum Code Signing Baseline Requirements and your CA's instructions to confirm the accepted hardware, key algorithm, and issuance process.
-
*
Process of Code Signing with the YubiKey
The process involves generating a key pair and CSR, creating key-attestation evidence when required, submitting the request to your CA, and installing the issued certificate on the YubiKey.
This guide uses YubiKey Manager's graphical interface for key generation and certificate installation, along with the ykman command-line tool for attestation. The instructions cover Windows, macOS, and Linux, with operating-system-specific commands where needed.
Before you begin, make sure you have:
- A YubiKey model that supports PIV and meets your CA's requirements.
- YubiKey Manager installed on your computer.
- The ykman command-line tool available.
- Access to your CA's certificate-ordering portal.
- Confirmation of the required key slot, algorithm, and attestation format.
Important: The correct PIV slot depends on the CA's instructions and the intended signing workflow. For example, Sectigo's documented EV Code Signing workflow uses slot 9a, while its instructions identify slot 9c for PDF document signing. Follow the instructions for your particular certificate rather than changing slots without checking compatibility.
-
*
Steps for YubiKey CSR Generation and Attestation
Step 1: Install YubiKey Manager
Download YubiKey Manager from Yubico's official website, selecting the version for Windows, macOS, or Linux.
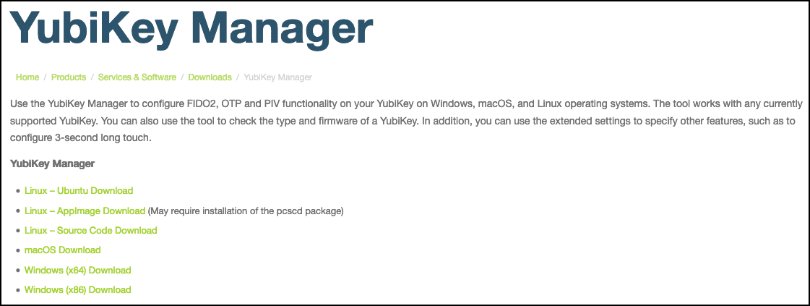
Install the application and connect your YubiKey. Launch YubiKey Manager and confirm that your device appears in the application.
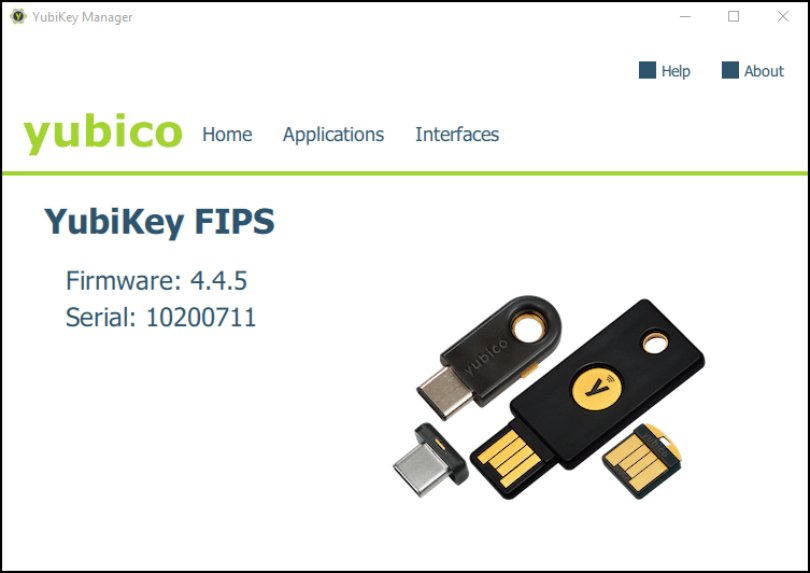
Step 2: Access YubiKey Manager and Configure PIV
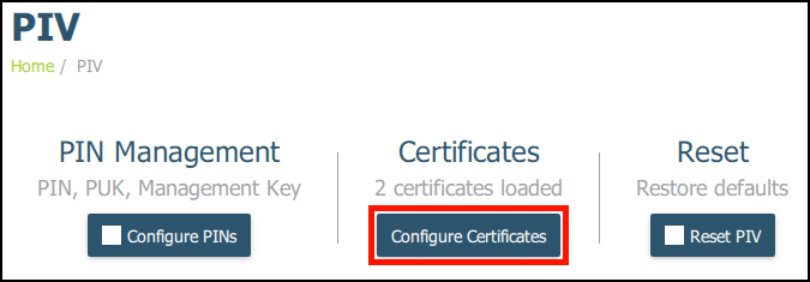
Open YubiKey Manager and navigate to Applications → PIV.
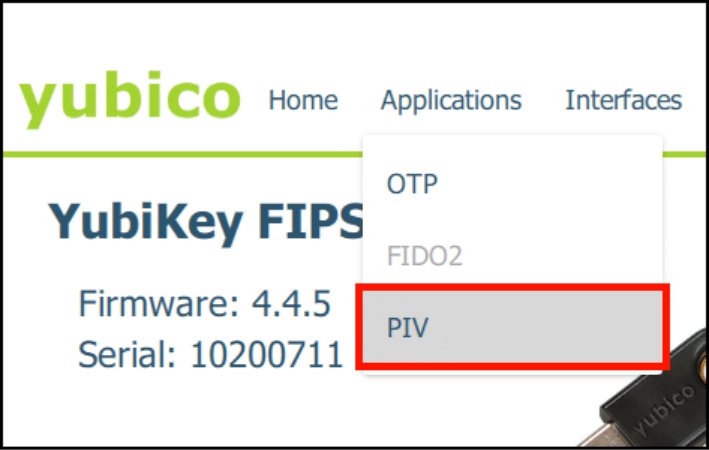
Select Configure Certificates to access the certificate and key-management options.
Step 3: Generate the Key Pair and CSR
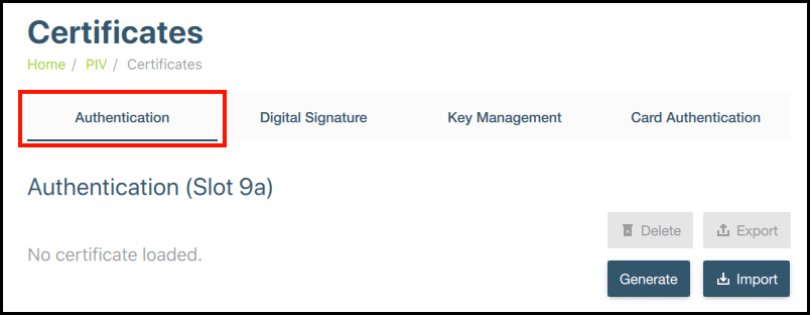
Select the PIV slot specified by your CA.
For the Sectigo EV Code Signing workflow described above, select Authentication (slot 9a). Other workflows may require a different slot.
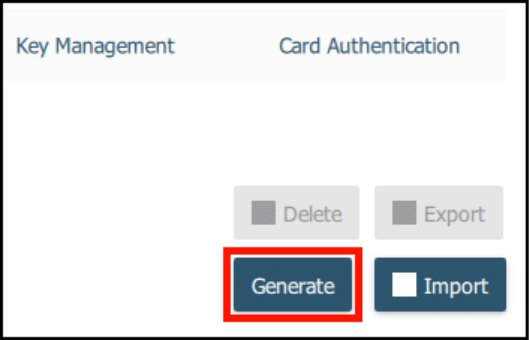
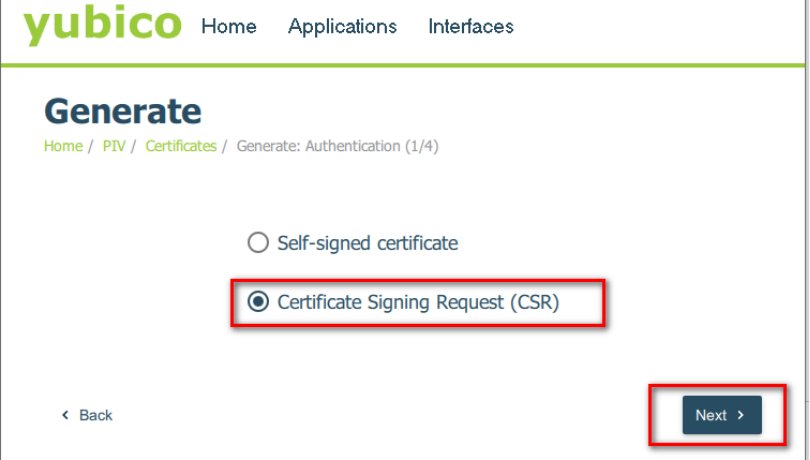
Click Generate, select Certificate Signing Request (CSR), and continue.
Step 4: Choose the Algorithm and Enter a Subject Name
Select an algorithm accepted by your CA and supported by your YubiKey. The original graphical workflow offers ECCP256 or ECCP384 as examples for Code Signing.
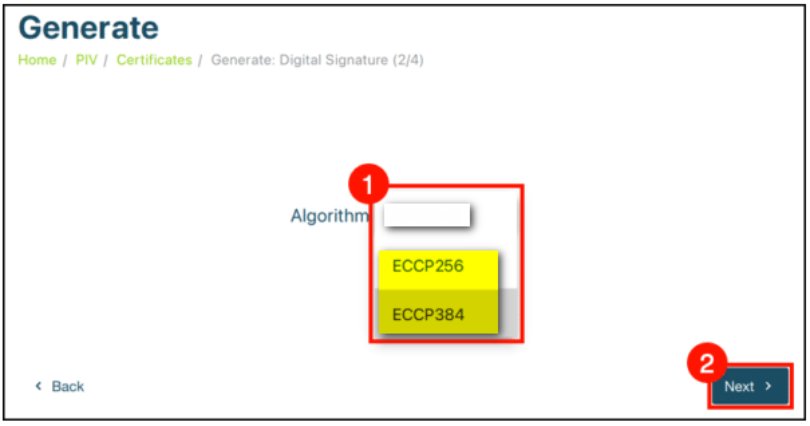
Enter a Subject Name and continue. In this workflow, the Subject Name entered in the key-generation interface is not necessarily the identity information used in the CSR; follow the prompts and the CA's requirements.
Step 5: Generate and Save the CSR
Review the settings and click Generate. Choose a location and filename for the CSR, then save it.
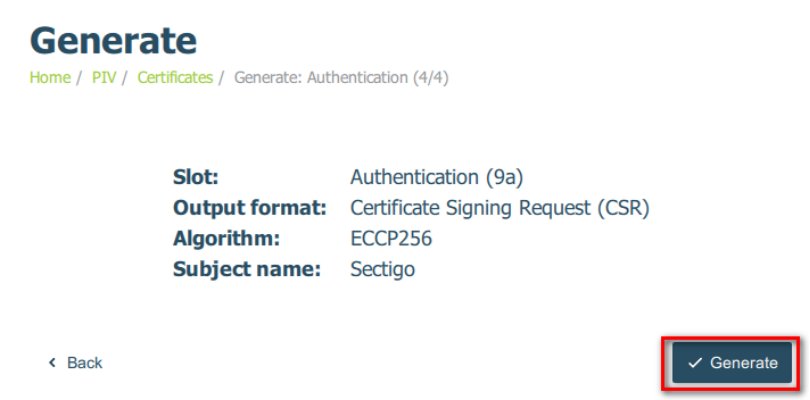
When prompted, enter your YubiKey management key and PIN.
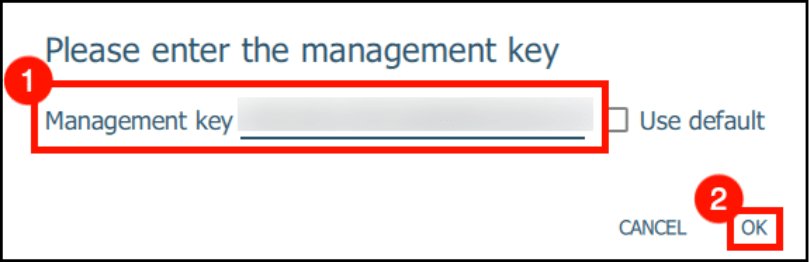
The CSR contains the public key and certificate-request information, not the private key. Keep the CSR file available for submission to your CA.
Step 6: Open PowerShell or a Terminal
Open Windows PowerShell or a terminal on macOS or Linux.
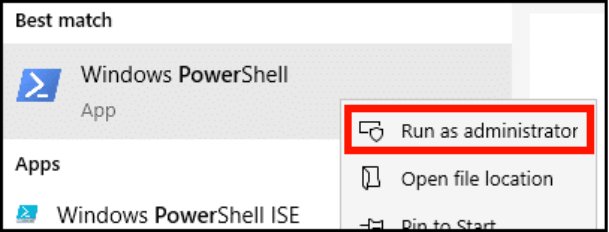
You will use ykman to generate the attestation certificate and export the supporting certificate from PIV slot F9
Step 7: Navigate to the YubiKey Manager Directory
If ykman is not available through your system's PATH, navigate to the directory containing the executable.
Windows:
cd "C:\Program Files\Yubico\YubiKey Manager"macOS:
cd /Applications/YubiKey\ Manager.app/Contents/MacOSLinux:
On some distributions, including Ubuntu installations where ykman is already in the PATH, you can run the commands directly without changing directories.
Installation paths may differ depending on the package and version you installed.
Step 8: Generate the Attestation Certificate
Run the command for your operating system. Replace 9a with the slot used to generate the key pair if your CA's workflow specifies a different slot.
Windows:
.\ykman.exe piv keys attest 9a attestation.crt
macOS:
./ykman piv keys attest 9a attestation.crt
Linux:
ykman piv keys attest 9a attestation.crt
The command creates an attestation certificate for the key in the specified slot. Attestation provides evidence that the key was generated on the YubiKey rather than imported from another location.
Step 9: Export the Supporting Certificate from Slot F9
Export the certificate stored in PIV slot F9, which is used for YubiKey attestation.
Windows:
.\ykman.exe piv certificates export f9 intermediateCA.crt
macOS:
./ykman piv certificates export f9 intermediateCA.crt
Linux:
ykman piv certificates export f9 intermediateCA.crt
The command creates intermediateCA.crt. Keep this file with the attestation certificate for the next step.
Step 10: Combine and Base64-Encode the Attestation Files
Follow the instructions specified on the order generation page for the required attestation format. In the Sectigo workflow described in its current instructions, the attestation certificate and the certificate exported from slot F9 are combined and Base64-encoded. The enrollment form expects the resulting Base64 data without PEM header and footer lines.
First, combine the two certificate files.
Windows:
type attestation.crt intermediateCA.crt > attestation.pemmacOS or Linux:
cat attestation.crt intermediateCA.crt > attestation.pemNext, Base64-encode the combined file.
Windows:
certutil -encode attestation.pem attestation.b64Remove the PEM header and footer lines from the encoded output by writing the filtered content to a separate file:
findstr /v CERTIFICATE attestation.b64 > attestation_clean.b64Use attestation_clean.b64 as the Base64 attestation data for this workflow.
macOS or Linux:
base64 < attestation.pem | tr -d '\r\n' > attestation_clean.b64These commands follow the file preparation method described above. Other CAs may require a different attestation format, so confirm their instructions before submitting the data.
Step 11: Submit the CSR and Attestation
Please go to the GoGetSSL Client Area and start the order generation process. Depending on the vendor (Sectigo or DigiCert) , submit the CSR and attestation data as requested via the corresponding form.
Submit the CSR in PEM format, including its header and footer lines, and provide the Base64 attestation without PEM header and footer lines when that is what the enrollment form requests.
Once the CA validates the CSR and attestation and completes any required checks, it can issue the Code Signing certificate.
-
*
How to Install a Code Signing Certificate on YubiKey 5 FIPS
After the CA issues your Code Signing certificate, import it into the same PIV slot that contains the private key used to generate the CSR.
Step 1: Open YubiKey Manager and Navigate to PIV
Launch YubiKey Manager and connect your YubiKey.
Navigate to Applications → PIV, then select Configure Certificates.
Step 2: Select the Correct Slot
Choose the same slot used during key generation. For example, if you generated the key in slot 9a, select Authentication (9a).
Do not import the certificate into a different slot from the one containing the matching private key.
Step 3: Import the Issued Certificate
Click Import and browse to the end-entity Code Signing certificate issued by your CA.
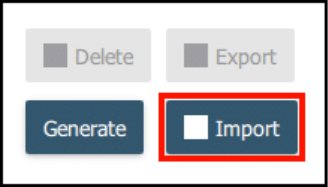
Select the certificate file and follow the prompts to import it.
Step 4: Enter the Management Key
When prompted, enter the management key for your YubiKey.
If the management key has been changed from its default, use the configured value. Follow your organization's security policy for storing and managing it.
Step 5: Enter the PIN
Enter your YubiKey PIN when prompted and complete the import process.
For a complete certificate chain, follow the CA's instructions regarding any required intermediate or root certificates.
-
*
How to Sign Your Files with a Code Signing Certificate Using YubiKey
On Windows, Microsoft SignTool can sign executable files using a certificate accessible through the Windows certificate store and supported hardware-token interfaces.
Step 1: Install and Locate SignTool
Download and install the Windows SDK if it is not already installed.
SignTool is included in the SDK. One possible path on a 64-bit Windows installation is:
C:\Program Files (x86)\Windows Kits\10\bin\10.0.22621.0\x64
For the 32-bit executable, the path may be:
C:\Program Files (x86)\Windows Kits\10\bin\10.0.22621.0\x86
The SDK version and installation path may differ. Adjust the path to match your installation.
Step 2: Sign the File
Connect the YubiKey and confirm that Windows can access the certificate. Open Command Prompt and run the following command, replacing the path with the file you want to sign:
signtool sign /tr http://timestamp.sectigo.com /td SHA256 /fd SHA256 /a "C:\Path\to\yourfile.exe"
The /fd SHA256 option specifies the file digest algorithm, /tr specifies the RFC 3161 timestamp server, /td SHA256 specifies the timestamp digest algorithm, and /a asks SignTool to select the best matching certificate from the available certificate store.
The timestamp URL is an example for Sectigo. Use the timestamp service specified by your CA. For example:
- Sectigo: http://timestamp.sectigo.com
- DigiCert: http://timestamp.digicert.com
If SignTool cannot find the certificate, check that the certificate has been imported into the correct PIV slot and is available to Windows. You may need to enter your PIN or complete another authentication prompt.
Step 3: Verify the Signed File
After signing, verify the signature using:
signtool verify /pa /v "C:\Path\to\yourfile.exe"
The /pa option applies the default Authenticode verification policy, while /v enables verbose output.
Review the result to confirm that verification succeeds and that the expected signer certificate is displayed. You can also open the executable's Properties → Digital Signatures tab to inspect the signature.
-
*
Conclusion
A compatible YubiKey can help protect your Code Signing private key by keeping it on the hardware device and restricting access to signing operations. The correct configuration depends on the certificate type, YubiKey model, PIV slot, algorithm, and CA requirements.
Follow the described instructions to generate the key pair and CSR, create the required attestation evidence, submit your request, and install the issued certificate into the matching PIV slot. You can then use SignTool or another compatible signing tool to sign and verify your files.
-